Monday, September 8, 2008

MIXED MEAT CANNELLONI


Hey! I can't believe it...I'm posting and it's not just for the Daring Bakers Challenge...hoooray! Anyway, I HAD to share this recipe! The picture above isn't the best but it did taste good and I should have left it in the oven a bit longer to allow the top to brown a bit more but it was 8:30 on a work night and I think my husband was going to absolutely die!!! :) Next time will be better - hey maybe I'll swap the picture then :) Anyway, I was at Borders convincing myself I do NOT need another cookbook until I start making things in the ones I already bought. (I just love looking through them though!!!) Anyway, this one was on the clearance section for $4.99...now how can you pass that up...I looked in it and saw a baklava recipe (me and my mom love Baklava) anyway...had to get it! It's called 500 Best-Ever Recipes Mediterranean and this recipe just caught my eye...I defiantly recommend you make it, me and my daughter was eating just the meat in the pan that wouldn't fit in the cannelloni's. Well here is how I made it with some changes to the original recipe:

Bring a pot of water to a boil and make cannelloni (or I used mancotti) and make to box directions.


Heat 4 TBS of olive oil in pan, add 1 onion finely chopped, 2 crushed garlic cloves and 2 ripe Italian plum tomatoes peeled and finely chopped. Cook over low heat, stirring for about 10 minutes or until soft. Add 4 1/2 oz of ground beef, 4 1/2 oz of ground pork and 9 oz of ground chicken. Cook for 10 minutes, stirring frequently to break up. Then add 2 Tbsp of butter and 6 Tbsp heavy cream and cook gently stirring occasionally for about 10 minutes. Allow to cool.


Preheat oven to 375 degrees

To make white sauce, melt 1/4 cup of butter in medium saucepan, add 1/2 cup of all-purpose flour and cook, stirring for 1-2 minutes. Add 3 3/4 cups of milk slowly while whisking vigorously. Bring to the boil and cook, stirring, until smooth and thick. Season with salt and pepper and whisk well. Remove from heat.


Spoon a little of the white sauce into a baking dish. Fill the tubes with the meat mixture and place in a single layer in the dish, Pour the remaining white sauce over them, then sprinkle with Parmesan. (recipe calls for 1 cup...I used a bit more because I love it). Bake for 35-40 minutes until heated through. Allow to stand for 10 minutes.

Monday, September 1, 2008

August 2008 - Daring Bakers Challenge - Chocolate E'clairs by Pierre Herme'


Hello! I know I'm really on a roll with my blog eh? Well stayed tuned I'm going to get going on it...I promised myself :) AND I'm a day late posting but I guess better late than never? I started making the eclairs yesterday and I don't know what was going through my mind but I wasn't thinking that was the "day" I'm like duh tomorrow is Labor Day the 1st...I guess I knew I had another day off work and in my mind today is Sunday :) Anyway, it was fun making the eclairs and I would do it again....except I'm used to the custard filling and I would go with that. Well today is my grandpa's birthday and were going over there for a birthday/Labor Day party so I'm bringing my elcairs with me. The only thing I'm worried about is where it says serve them immediately...I hope their not too soggy since a few hours will be going by before serving them. Anyway here is how it goes:


CHOCOLATE E'CLAIRS BY PIERRE HERME'

Pierre Hermé’s Chocolate Éclairs
Recipe from Chocolate Desserts by Pierre Hermé
(makes 20-24 Éclairs)

• Cream Puff Dough (see below for recipe), fresh and still warm

1) Preheat your oven to 375 degrees F (190 degrees C). Divide the oven into thirds by
positioning the racks in the upper and lower half of the oven. Line two baking sheets with
waxed or parchment paper.

2) Fill a large pastry bag fitted with a 2/3 (2cm) plain tip nozzle with the warm cream puff dough.
Pipe the dough onto the baking sheets in long, 4 to 41/2 inches (about 11 cm) chubby fingers.
Leave about 2 inches (5 cm) space in between each dough strip to allow them room to puff.
The dough should give you enough to pipe 20-24 éclairs.

3) Slide both the baking sheets into the oven and bake for 7 minutes. After the 7 minutes, slip the
handle of a wooden spoon into the door to keep in ajar. When the éclairs have been in the
oven for a total of 12 minutes, rotate the sheets top to bottom and front to back. Continue
baking for a further 8 minutes or until the éclairs are puffed, golden and firm. The total baking
time should be approximately 20 minutes.

Notes:
1) The éclairs can be kept in a cool, dry place for several hours before filling.

Assembling the éclairs:

• Chocolate glaze (see below for recipe)
• Chocolate pastry cream (see below for recipe)

1) Slice the éclairs horizontally, using a serrated knife and a gently sawing motion. Set aside the
bottoms and place the tops on a rack over a piece of parchment paper.

2) The glaze should be barely warm to the touch (between 95 – 104 degrees F or 35 – 40
degrees C, as measured on an instant read thermometer). Spread the glaze over the tops of
the éclairs using a metal icing spatula. Allow the tops to set and in the meantime fill the
bottoms with the pastry cream.

3) Pipe or spoon the pastry cream into the bottoms of the éclairs. Make sure you fill the bottoms
with enough cream to mound above the pastry. Place the glazed tops onto the pastry cream
and wriggle gently to settle them.

Notes:
1) If you have chilled your chocolate glaze, reheat by placing it in a bowl over simmering water,
stirring it gently with a wooden spoon. Do not stir too vigorously as you do not want to create
bubbles.

2) The éclairs should be served as soon as they have been filled.

Pierre Hermé’s Cream Puff Dough
Recipe from Chocolate Desserts by Pierre Hermé
(makes 20-24 Éclairs)

• ½ cup (125g) whole milk
• ½ cup (125g) water
• 1 stick (4 ounces; 115g) unsalted butter, cut into 8 pieces
• ¼ teaspoon sugar
• ¼ teaspoon salt
• 1 cup (140g) all-purpose flour
• 5 large eggs, at room temperature

1) In a heavy bottomed medium saucepan, bring the milk, water, butter, sugar and salt to the
boil.

2) Once the mixture is at a rolling boil, add all of the flour at once, reduce the heat to medium
and start to stir the mixture vigorously with a wooden spoon. The dough comes together very
quickly. Do not worry if a slight crust forms at the bottom of the pan, it’s supposed to. You
need to carry on stirring for a further 2-3 minutes to dry the dough. After this time the dough
will be very soft and smooth.

3) Transfer the dough into a bowl of a mixer fitted with the paddle attachment, or using your
handmixer or if you still have the energy, continue by hand. Add the eggs one at a time,
beating after each egg has been added to incorporate it into the dough.
You will notice that after you have added the first egg, the dough will separate, once again do
not worry. As you keep working the dough, it will come back all together again by the time you
have added the third egg. In the end the dough should be thick and shiny and when lifted it
should fall back into the bowl in a ribbon.

4) The dough should be still warm. It is now ready to be used for the éclairs as directed above.


Notes:
1) Once the dough is made you need to shape it immediately.

2) You can pipe the dough and the freeze it. Simply pipe the dough onto parchment-lined baking
sheets and slide the sheets into the freezer. Once the dough is completely frozen, transfer the
piped shapes into freezer bags. They can be kept in the freezer for up to a month.


Chocolate Pastry Cream
Recipe from Chocolate Desserts by PierreHermé

• 2 cups (500g) whole milk
• 4 large egg yolks
• 6 tbsp (75g) sugar
• 3 tablespoons cornstarch, sifted
• 7 oz (200g) bittersweet chocolate, preferably Velrhona Guanaja, melted
• 2½ tbsp (1¼ oz: 40g) unsalted butter, at room temperature

1) In a small saucepan, bring the milk to a boil. In the meantime, combine the yolks, sugar and cornstarch together and whisk in a heavy‐bottomed saucepan.

2) Once the milk has reached a boil, temper the yolks by whisking a couple spoonfuls of the hot milk into the yolk mixture.Continue whisking and slowly pour the rest of the milk into the tempered yolk mixture.

3) Strain the mixture back into the saucepan to remove any egg that may have scrambled. Place the pan over medium heat and whisk vigorously (without stop) until the mixture returns to a boil. Keep whisking vigorously for 1 to 2 more minutes (still over medium heat).Stir in the melted chocolate and then remove the pan from the heat.

4) Scrape the pastry cream into a small bowl and set it in an ice‐water bath to stop the cooking process. Make sure to continue stirring the mixture at this point so that it remains smooth.

5) Once the cream has reached a temperature of 140 F remove from the ice‐water bath and stir in the butter in three or four installments. Return the cream to the ice‐water bath to continue cooling, stirring occasionally, until it has completely cooled. The cream is now ready to use or store in the fridge.

[bNotes:[/b]
1) The pastry cream can be made 2‐3 days in advance and stored in the refrigerator.

2) In order to avoid a skin forming on the pastry cream, cover with plastic wrap pressed onto the cream.

3) Tempering the eggs raises the temperature of the eggs slowly so that they do not scramble.


Chocolate Glaze
Recipe from Chocolate Desserts by Pierre Hermé
(makes 1 cup or 300g)

• 1/3 cup (80g) heavy cream
• 3½ oz (100g) bittersweet chocolate, finely chopped
• 4 tsp (20 g) unsalted butter, cut into 4 pieces, at room temperature
• 7 tbsp (110 g) Chocolate Sauce (recipe below), warm or at room temperature

1)In a small saucepan, bring the heavy cream to a boil. Remove from the heat and slowly begin to add the chocolate, stirring with a wooden spoon or spatula.

2) Stirring gently, stir in the butter, piece by piece followed by the chocolate sauce.

Notes:
1) If the chocolate glaze is too cool (i.e. not liquid enough) you may heat it briefly
 in the microwave or over a double boiler. A double boiler is basically a bowl sitting over (not touching) simmering water.

2) It is best to glaze the eclairs after the glaze is made, but if you are pressed for time, you can make the glaze a couple days ahead of time, store it in the fridge and bring it up to the proper temperature (95 to 104 F) when ready to glaze.

Chocolate Sauce
Recipe from Chocolate Desserts by Pierre Hermé
(makes 1½ cups or 525 g)


• 4½ oz (130 g) bittersweet chocolate, finely chopped
• 1 cup (250 g) water
• ½ cup (125 g) crème fraîche, or heavy cream
• 1/3 cup (70 g) sugar

1) Place all the ingredients into a heavy‐bottomed saucepan and bring to a boil, making sure to stir constantly. Then reduce the heat to low and continue stirring with a wooden spoon until the sauce thickens.

2) It may take 10‐15 minutes for the sauce to thicken, but you will know when it is done when it coats the back of your spoon.

Notes:
1) You can make this sauce ahead of time and store it in the refrigerator for two weeks. Reheat the sauce in a microwave oven or a double boiler before using.
2) This sauce is also great for cakes, ice-cream and tarts.


Sheltie Girl of http://glutenagogo.blogspot.com/ and Helen of http://tartelette.blogspot.com/ have been kind enough to help us out with queries and problems that might arise during this challenge - from both Tony and myself, we'd like to thank both of you.

So folks, the official éclair month has just begun on the Daring Bakers forum. Please keep in mind whatever you do or make of this recipe - it's supposed to be fun .... and a secret till posting day!

All the best and have fun!

Hugs

Tony & Meeta
_______________

Eclair Porn on Flickr:

~ http://www.flickr.com/photos/geraldgoh/2358983764/
~ http://www.flickr.com/photos/cafefernando/478810431/
~ http://www.flickr.com/photos/plaudy/433 … otostream/ - Step 1
~ http://www.flickr.com/photos/plaudy/433 … otostream/ - Step 2
~ http://www.flickr.com/photos/jennerator/2418749995/
~ http://www.flickr.com/photos/wscwong/1713864046/
~ http://www.flickr.com/photos/doreenseng/2144651457/
~ http://www.flickr.com/photos/anitachu/2076015139/



Wednesday, July 30, 2008

DARING BAKERS CHALLENGE - JULY 2008 - Filbert Gateau with Praline Buttercream


Filbert Gateau with Praline Buttercream


Hi All! Well here is my 3rd Daring Bakers Challenge!!! Wow commitment :) - Have to be honest, didn't enjoy making this one or even eating it (sorry just being honest) however, I didn't hate it as much as the opera cake so improvement? I really did struggle with this one and soooo time consuming geeeeesh! The Praline Paste didn't happen and my cakes did not rise well. Oh well, I guess every little thing you do you learn from right? Well I didn't do all this work without posting it for my July 2008 challenge :) Well maybe somebody else would like it so here it is.


Filbert Gateau with Praline ButtercreamFrom Great Cakes by Carol Walter1 Filbert Genoise1 recipe sugar syrup, flavored with dark rum1 recipe Praline Buttercream½ cup heavy cream, whipped to soft peaks1 recipe Apricot Glaze1 recipe Ganache Glaze, prepared just before using3 tablespoons filberts, toasted and coarsely choppedFilbert GenoiseBecause of the amount of nuts in the recipe, this preparation is different from a classic genoise.1 ½ cups hazelnuts, toasted/skinned2/3 cup cake flour, unsifted2 Tbsp. cornstarch7 large egg yolks1 cup sugar, divided ¼ & ¾ cups1 tsp. vanilla extract½ tsp. grated lemon rind5 lg. egg whites¼ cup warm, clarified butter (100 – 110 degrees)Position rack in the lower 3rd of the oven and preheat to 350 degrees. Grease and flour a 10” X 2” inch round cake pan. Using a food processor, process nuts, cake flour, and cornstarch for about 30 seconds. Then, pulse the mixture about 10 times to get a fine, powdery mixture. You’ll know the nuts are ready when they begin to gather together around the sides of the bowl. While you want to make sure there aren’t any large pieces, don’t over-process. Set aside. Put the yolks in the bowl of an electric mixer, with the whisk attachment, and beat until thick and light in color, about 3-4 minutes on med-high speed. Slowly, add ¾ cup of sugar. It is best to do so by adding a tablespoon at a time, taking about 3 minutes for this step. When finished, the mixture should be ribbony. Blend in the vanilla and grated lemon rind. Remove and set aside.Place egg whites in a large, clean bowl of the electric mixer with the whisk attachment and beat on medium speed, until soft peaks. Increase to med-high speed and slowly add the remaining ¼ cup of sugar, over 15-20 seconds or so. Continue to beat for another ½ minute. Add the yolk mixture to the whites and whisk for 1 minute. Pour the warm butter in a liquid measure cup (or a spouted container). * It must be a deep bottom bowl and work must be fast.* Put the nut meal in a mesh strainer (or use your hand – working quickly) and sprinkle it in about 2 tablespoons at a time – folding it carefully for about 40 folds. Be sure to exclude any large chunks/pieces of nuts. Again, work quickly and carefully as to not deflate the mixture. When all but about 2 Tbsp. of nut meal remain, quickly and steadily pour the warm butter over the batter. Then, with the remaining nut meal, fold the batter to incorporate, about 13 or so folds. With a rubber spatula, transfer the batter into the prepared pan, smoothing the surface with the spatula or back of a spoon. **If collected butter remains at the bottom of the bowl, do not add it to the batter! It will impede the cake rising while baking.Tap the pan on the counter to remove air bubbles and bake in the preheated oven for 30-35 minutes. You’ll know the cake is done when it is springy to the touch and it separates itself from the side of the pan. Remove from oven and allow to stand for 5 minutes. Invert onto a cake rack sprayed with nonstick coating, removing the pan. Cool the cake completely.*If not using the cake right away, wrap thoroughly in plastic wrap, then in a plastic bag, then in the refrigerator for up to 3 days. If freezing, wrap in foil, then the bag and use within 2-3 months.Sugar SyrupMakes 1 cup, good for one 10-inch cake – split into 3 layers1 cup water¼ cup sugar2 Tbsp. dark rum or orange flavored liqueur In a small, yet heavy saucepan, bring the water and sugar to a boil and simmer for 5 minutes. Remove from heat, add the liqueur. Cool slightly before using on the cake. *Can be made in advance.Praline Buttercream1 recipe Swiss Buttercream 1/3 cup praline paste1 ½ - 2 Tbsp. Jamaican rum (optional)Blend ½ cup buttercream into the paste, then add to the remaining buttercream. Whip briefly on med-low speed to combine. Blend in rum.Swiss Buttercream4 lg. egg whites¾ cup sugar1 ½ cups (3 sticks) unsalted butter, slightly firm1 ½ -2 Tbsp. Grand Marnier or liqueur of your choice1 tsp. vanillaPlace the egg whites in a lg/ bowl of a elevtric mixer and beat with the whisk attachment until the whites are foamy and they begin to thicken (just before the soft peak stage). Set the bowl over a saucepan filled with about 2 inches of simmering water, making sure the bowl is not touching the water. Then, whisk in the sugar by adding 1-2 tablespoon of sugar at a time over a minutes time. Continue beating 2-3 minutes or until the whites are warm (about 120 degrees) and the sugar is dissolved. The mixture should look thick and like whipped marshmallows.Remove from pan and with either the paddle or whisk attachment, beat the egg whites and sugar on med-high until its a thick, cool meringue – about 5-7 minutes. *Do not overbeat*. Set aside. Place the butter in a separate clean mixing bowl and, using the paddle attachment, cream the butter at medium speed for 40-60 seconds, or until smooth and creamy. *Do not overbeat or the butter will become toooooo soft.*On med-low speed, blend the meringue into the butter, about 1-2 Tbsp. at a time, over 1 minute. Add the liqueur and vanilla and mix for 30-45 seconds longer, until thick and creamy.Refrigerate 10-15 minutes before using.Wait! My buttercream won’t come together! Reheat the buttercream briefly over simmering water for about 5 seconds, stirring with a wooden spoon. Be careful and do not overbeat. The mixture will look broken with some liquid at the bottom of the bowl. Return the bowl to the mixer and whip on medium speed just until the cream comes back together. Wait! My buttercream is too soft! Chill the buttercream in the refrigerator for about 10 minutes and rewhip. If that doesn’t work, cream an additional 2-4 Tbsp. of butter in a small bowl– making sure the butter is not as soft as the original amount, so make sure is cool and smooth. On low speed, quickly add the creamed butter to the buttercream, 1 Tbsp. at a time.Refrigerate in an airtight container for up to 5 days, or can be frozen for up to 6 months. If freezing, store in 2 16-oz. plastic containers and thaw in the refrigerator overnight or at room temperature for several hours.Praline Paste1 cup (4 ½ oz.) Hazelnuts, toasted/skinless2/3 cup SugarLine a jelly roll pan with parchment and lightly butter. Put the sugar in a heavy 10-inch skillet. Heat on low flame for about 10-20 min until the sugar melts around the edges. Do not stir the sugar. Swirl the pan if necessary to prevent the melted sugar from burning. Brush the sides of the pan with water to remove sugar crystals. If the sugar in the center does not melt, stir briefly. When the sugar is completely melted and caramel in color, remove from heat. Stir in the nuts with a wooden spoon and separate the clusters. Return to low heat and stir to coat the nuts on all sides. Cook until the mixture starts to bubble. **Remember – extremely hot mixture.** Then onto the parchment lined sheet and spread as evenly as possible. As it cools, it will harden into brittle. Break the candied nuts into pieces and place them in the food processor. Pulse into a medium-fine crunch or process until the brittle turns into a powder. To make paste, process for several minutes. Store in an airtight container and store in a cook dry place. Do not refrigerate.Apricot GlazeGood for one 10-inch cake2/3 cup thick apricot preserves1 Tbsp. waterIn a small, yet heavy saucepan, bring the water and preserves to a slow boil and simmer for 2-3 minutes. If the mixture begins to stick to the bottom of the saucepan, add water as needed.Remove from heat and, using a strainer, press the mixture through the mesh and discard any remnants. With a pastry brush, apply the glaze onto the cake while the cake is still warm. If the glaze is too thick, thin to a preferred consistency with drops of water.Ganache GlazeMakes about 1 cup, enough to cover the top and sides of a 9 or 10 inch layer or tube cake **Ganache can take on many forms. While warm – great fudge sauce. While cool or lukewarm – semisweet glaze. Slightly chilled – can be whipped into a filling/frosting. Cold & solid – the base of candied chocolate truffles.6 oz. (good) semisweet or bittersweet chocolate, like Lindt6 oz. (¾ cup heavy cream1 tbsp. light corn syrup1 Tbsp. Grand Marnier, Cointreay, or dark Jamaican rum (optional)¾ tsp. vanilla½ - 1 tsp. hot water, if neededBlend vanilla and liqueur/rum together and set aside. Break the chocolate into 1-inch pieces and place in the basket of a food processor and pulse until finely chopped. Transfer into a medium sized bowl and set aside. Heat the cream and corn syrup in a saucepan, on low, until it reached a gentle boil. Once to the gently boil, immediately and carefully pour over the chocolate. Leave it alone for one minute, then slowly stir and mix the chocolate and cream together until the chocolate is melted and incorporated into the cream. Carefully blend in vanilla mixture. If the surface seems oily, add ½ - 1 tsp hot water. The glaze will thicken, but should still be pourable. If it doesn’t thicken, refrigerate for about 5 minutes, but make sure it doesn’t get too cold!Assembling CakeCut a cardboard disk slightly smaller than the cake. Divide the cake into 3 layers and place the first layer top-side down on the disk. Using a pastry brush, moisten the layer with 3-4 Tbsp. of warm sugar syrup. Measure out 1 cup of praline buttercream and set aside.Spread the bottom layer with a ¼-inch thickness of the remaining buttercream. Cover with ½ of the whipped cream, leaving ¼-inch border around the edge of the cake. Place the middle layer over the first, brush with sugar syrup, spreading with buttercream. Cover with the remaining whipped cream. Moisten the cut side of the third layer with additional sugar syrup and place cut side down on the cake. Gently, press the sides of the cake to align the layers. Refrigerate to chill for at least 30 minutes. Lift the cake by sliding your palm under the cardboard. Holding a serrated or very sharp night with an 8-ich blade held parallel to the sides of the cake, trim the sides so that they are perfectly straight. Cut a slight bevel at the top to help the glaze drip over the edge. Brush the top and sides of the cake with warm apricot glaze, sealing the cut areas completely. Chill while you prepare the ganache.Place a rack over a large shallow pan to catch the ganache drippings. Remove the gateau from the refrigerator and put it the rack. With a metal spatula in hand, and holding the saucepan about 10 inches above the cake, pour the ganache onto the cake’s center. Move the spatula over the top of the ganache about 4 times to get a smooth and mirror-like appearance. The ganache should cover the top and run down the sides of the cake. When the ganache has been poured and is coating the cake, lift one side of the rack and bang it once on the counter to help spread the ganache evenly and break any air bubbles. (Work fast before setting starts.) Patch any bare spots on the sides with a smaller spatula, but do not touch the top after the “bang”. Let the cake stand at least 15 minutes to set after glazing.To garnish the cake, fit a 12 – 14-inch pastry bag with a #114 large leaf tip. Fill the bag with the reserved praline cream. Stating ½ inch from the outer edge of the cake, position the pastry tube at a 90 degree angle with the top almost touching the top of the cake. Apply pressure to the pastry bag, moving it slightly toward the center of the cake. As the buttercream flows on the cake, reverse the movement backward toward the edge of the cake and finish by pulling the bag again to the center. Stop applying pressure and press the bag downward, then quickly pull the tip up to break the flow of frosting. Repeat, making 12 leaves evenly spaced around the surface of the cake. Make a second row of leaves on the top of the first row, moving the pastry bag about ¾ inch closer to the center. The leaves should overlap. Make a 3rd row, moving closer and closer to the center. Add a 4th row if you have the room. But, leave a 2-inch space in the center for a chopped filbert garnish. Refrigerate uncovered for 3-4 hours to allow the cake to set. Remove the cake from the refrigerator at least 3 hours before serving.Leftover cake can be covered with foil and kept in the refrigerator for up to 5 days.
Last edited by Mele Cotte (2008-07-13 08:52:12)


Sunday, June 29, 2008

2nd Daring Bakers Challenge - DANISH BRAID


June was such a challenging month for me on so many different levels! But I won't bore you with those details :) anyway, I DID complete my second Daring Bakers Challenge!!! I really, really enjoyed this one...This wouldn't of probably been something I picked out on my own and which is just what I'm looking for. For mine I just bought strawberry preserves, I only made 1/2 of the dough and still have half in the freezer where I'm going to make cheese danishes one day this week while I'm off on vacation (whooo hooooo...oh sorry) I also would like to try fresh strawberries too. Anyway...I really like this one...here is how you make it...

DANISH DOUGH
Makes 2-1/2 pounds dough Ingredients For the dough (Detrempe)1 ounce fresh yeast or 1 tablespoon active dry yeast1/2 cup whole milk1/3 cup sugar Zest of 1 orange, finely grated3/4 teaspoon ground cardamom1-1/2 teaspoons vanilla extract1/2 vanilla bean, split and scraped2 large eggs, chilled1/4 cup fresh orange juice3-1/4 cups all-purpose flour1 teaspoon salt For the butter block (Beurrage)1/2 pound (2 sticks) cold unsalted butter1/4 cup all-purpose flour DOUGH Combine yeast and milk in the bowl of a mixer fitted with the paddle attachment and mix on low speed. Slowly add sugar, orange zest, cardamom, vanilla extract, vanilla seeds, eggs, and orange juice. Mix well. Change to the dough hook and add the salt with the flour, 1 cup at a time, increasing speed to medium as the flour is incorporated. Knead the dough for about 5 minutes, or until smooth. You may need to add a little more flour if it is sticky. Transfer dough to a lightly floured baking sheet and cover with plastic wrap. Refrigerate for 30 minutes.Without a standing mixer: Combine yeast and milk in a bowl with a hand mixer on low speed or a whisk. Add sugar, orange zest, cardamom, vanilla extract, vanilla seeds, eggs, and orange juice and mix well. Sift flour and salt on your working surface and make a fountain. Make sure that the “walls” of your fountain are thick and even. Pour the liquid in the middle of the fountain. With your fingertips, mix the liquid and the flour starting from the middle of the fountain, slowly working towards the edges. When the ingredients have been incorporated start kneading the dough with the heel of your hands until it becomes smooth and easy to work with, around 5 to 7 minutes. You might need to add more flour if the dough is sticky.
BUTTER BLOCK
Combine butter and flour in the bowl of a mixer fitted with a paddle attachment and beat on medium speed for 1 minute. Scrape down the sides of the bowl and the paddle and then beat for 1 minute more, or until smooth and lump free. Set aside at room temperature.2. After the detrempe has chilled 30 minutes, turn it out onto a lightly floured surface. Roll the dough into a rectangle approximately 18 x 13 inches and ¼ inch thick. The dough may be sticky, so keep dusting it lightly with flour. Spread the butter evenly over the center and right thirds of the dough. Fold the left edge of the detrempe to the right, covering half of the butter. Fold the right third of the rectangle over the center third. The first turn has now been completed. Mark the dough by poking it with your finger to keep track of your turns, or use a sticky and keep a tally. Place the dough on a baking sheet, wrap it in plastic wrap, and refrigerate for 30 minutes.3. Place the dough lengthwise on a floured work surface. The open ends should be to your right and left. Roll the dough into another approximately 13 x 18 inch, ¼-inch-thick rectangle. Again, fold the left third of the rectangle over the center third and the right third over the center third. No additional butter will be added as it is already in the dough. The second turn has now been completed. Refrigerate the dough for 30 minutes.4. Roll out, turn, and refrigerate the dough two more times, for a total of four single turns. Make sure you are keeping track of your turns. Refrigerate the dough after the final turn for at least 5 hours or overnight. The Danish dough is now ready to be used. If you will not be using the dough within 24 hours, freeze it. To do this, roll the dough out to about 1 inch in thickness, wrap tightly in plastic wrap, and freeze. Defrost the dough slowly in the refrigerator for easiest handling. Danish dough will keep in the freezer for up to 1 month.

Sunday, June 1, 2008

Peach and Cinnamon Cobbler

In an attempt to bribe my husband to watch the premier of "The Next Food Network Star" tonight I made him peach cobbler, something he has been wanting me to make but I just never did...so anyway, this week at work we had a book sale and they had "The Deen Bros." cookbook so I bought it because they had this recipe in it that looked good and many others...so here it goes:


Ingredients

Butter for coating dish

Filling

6 cups peaches, halved, pitted, and sliced 1/4 inch thick

3/4 cup sugar

1/4 quick-cooking tapioca

1 tsp ground cinnamon

1 tsp freshly squeezed lemon juice

Pinch salt

Topping
1 2/3 cups all-purpose flour, plus additional for dusting
3 1/2 tsp sugar
1 1/2 Tbs baking powder
1/8 tsp salt
6 Tbs cold unsalted butter, cut into cubes
2/3 cup heavy cream, plus additional for brushing


1. Preheat over to 350*. Butter a 2 1/2-quart baking dish.


In medium bowl, stir together the filling ingredients


Pour filling into the prepared dish; set aside.


2. For the topping, in a food processor or large bowl, pulse or whisk together the 1 2/3 cups flour, the sugar, baking powder, and salt. Pulse or cut in the butter until the mixture resembles coarse crumbs. Slowly add the 2/3 cups of cream, mixing until the dough just comes together. Turn the dough onto a lightly floured surface and pat together. Form the dough into 2-inch balls. Flatten balls gently with the palm of your hand.


3. Evenly arrange the dough rounds on top of the filling. Brush a little cream over the rounds. Bake about 1 hour or until the biscuits are golden and the filling is bubbling.


yummy!


Wednesday, May 28, 2008

1st DARING BAKERS CHALLENGE!! OPERA CAKE


Well here it is! My 1st Daring Bakers Challenge! Yaaa.. I made it for mothers day, however, I have to be honest...didn't love it... I'm sure others thinks its great but I'm not a huge white chocolate fan and I think I used too much syrup on the joconde...oh...also, in defense of the poor opera cake...I think my buttercream didn't turn out quite how I'm used to. Oh well...there is always next time right? Maybe I should try again but use chocolate...mmmmm bet it is really good for chocolate! Anyway, I really did feel challenged and really felt like I learned a lot... which it what I was really looking for. So maybe next time eh?


Can't wait until the next challenge!!


Anyway...here is how to make an opera cake:


For the joconde(Note: The joconde can be made up to 1 day in advance and kept wrapped at room temperate)What you’ll need:•2 12½ x 15½-inch (31 x 39-cm) jelly-roll pans (Note: If you do not have jelly-roll pans this size, do not fear! You can use different-sized jelly-roll pans like 10 x 15-inches.)•a few tablespoons of melted butter (in addition to what’s called for in the ingredients’ list) and a brush (to grease the pans)•parchment paper•a whisk and a paddle attachment for a stand mixer or for a handheld mixer•two mixing bowls (you can make do with one but it’s preferable to have two)Ingredients:6 large egg whites, at room temperature2 tbsp. (30 grams) granulated sugar2 cups (225 grams) ground blanched almonds (Note: If you do not want to use almond meal, you can use another nut meal like hazelnut. You can buy almond meal in bulk food stores or health food stores, or you can make it at home by grinding almonds in the food processor with a tablespoon or two of the flour that you would use in the cake. The reason you need the flour is to prevent the almonds from turning oily or pasty in the processor. You will need about 2 cups of blanched almonds to create enough almond meal for this cake.)2 cups icing sugar, sifted6 large eggs½ cup (70 grams) all-purpose flour3 tbsp. (1½ ounces; 45 grams) unsalted butter, melted and cooled1.Divide the oven into thirds by positioning a rack in the upper third of the oven and the lower third of the oven.2.Preheat the oven to 425◦F. (220◦C). 3.Line two 12½ x 15½- inch (31 x 39-cm) jelly-roll pans with parchment paper and brush with melted butter.4.In the bowl of a stand mixer fitted with the whisk attachment (or using a handheld mixer), beat the egg whites until they form soft peaks. Add the granulated sugar and beat until the peaks are stiff and glossy. If you do not have another mixer bowl, gently scrape the meringue into another bowl and set aside.5.If you only have one bowl, wash it after removing the egg whites or if you have a second bowl, use that one. Attach the paddle attachment to the stand mixer (or using a handheld mixer again) and beat the almonds, icing sugar and eggs on medium speed until light and voluminous, about 3 minutes. 6.Add the flour and beat on low speed until the flour is just combined (be very careful not to overmix here!!!). 7.Using a rubber spatula, gently fold the meringue into the almond mixture and then fold in the melted butter. Divide the batter between the pans and spread it evenly to cover the entire surface of each pan.8.Bake the cake layers until they are lightly browned and just springy to the touch. This could take anywhere from 5 to 9 minutes depending on your oven. Place one jelly-roll pan in the middle of the oven and the second jelly-roll pan in the bottom third of the oven.9.Put the pans on a heatproof counter and run a sharp knife along the edges of the cake to loosen it from the pan. Cover each with a sheet of parchment or wax paper, turn the pans over, and unmold. 10.Carefully peel away the parchment, then turn the parchment over and use it to cover the cakes. Let the cakes cool to room temperature. For the syrup(Note: The syrup can be made up to 1 week in advance and kept covered in the refrigerator.)What you’ll need:•a small saucepanIngredients:½ cup (125 grams) water⅓ cup (65 grams) granulated sugar1 to 2 tbsp. of the flavouring of your choice (i.e., vanilla extract, almond extract, cognac, limoncello, coconut cream, honey etc.)1.Stir all the syrup ingredients together in the saucepan and bring to a boil.2.Remove from the heat and let cool to room temperature.For the buttercream(Note: The buttercream can be made up to 1 month in advance and packed in an airtight container. If made way in advance, you can freeze the buttercream. Alternatively you can refrigerate it for up to 4 days after making it. To use the buttercream simply bring it to room temperature and then beat it briefly to restore its consistency.)(Update Note: The recipe for the buttercream that is listed below was originally based on the original but we had some typos. It's all very confusing (we're good at confusing ourselves) but here is the short of it: When testing the buttercream, we tested a modified version (we're crazy like that!!!) that had 2 cups sugar, ½ cup water and 1¾ cups butter. Yes. That's right. 1¾ cups of butter. The eggs remained the same. We ended up with a very creamy buttercream. VERY. CREAMY. But we don’t want anyone to be afraid of our modified version so you have the option of using the original version listed below or the quantities we’ve listed here in this note. If you are still confused and want to cry, then please e-mail us and we will comfort you!!! We promise!!!)What you’ll need:•a small saucepan•a candy or instant-read thermometer•a stand mixer or handheld mixer•a bowl and a whisk attachment•rubber spatulaIngredients:1 cup (100 grams) granulated sugar ¼ cup (60 grams) water seeds of one vanilla bean (split a vanilla bean down the middle and scrape out the seeds) or 1 tbsp. pure vanilla extract (Note: If you are flavouring your buttercream and do not want to use the vanilla, you do not have to. Vanilla will often enhance other flavours but if you want an intense, one-flavoured buttercream, then by all means leave it out!)1 large egg1 large egg yolk1¾ sticks (7 ounces; 200 grams) unsalted butter, at room temperature flavouring of your choice (a tablespoon of an extract, a few tablespoons of melted white chocolate, citrus zest, etc.)1.Combine the sugar, water and vanilla bean seeds or extract in a small saucepan and warm over medium heat just until the sugar dissolves.2.Continue to cook, without stirring, until the syrup reaches 225◦F (107◦C) [*Note: Original recipe indicates a temperature of 255◦F (124◦C), however, when testing the recipe I found that this was too high so we heated to 225◦F and it worked fine] on a candy or instant-read thermometer. Once it reaches that temperature, remove the syrup from the heat.3.While the syrup is heating, begin whisking the egg and egg yolk at high speed in the bowl of your mixer using the whisk attachment. Whisk them until they are pale and foamy.4.When the sugar syrup reaches the correct temperature and you remove it from the heat, reduce the mixer speed to low speed and begin slowly (very slowly) pouring the syrup down the side of the bowl being very careful not to splatter the syrup into the path of the whisk attachment. Some of the syrup will spin onto the sides of the bowl but don’t worry about this and don’t try to stir it into the mixture as it will harden! 5.Raise the speed to medium-high and continue beating until the eggs are thick and satiny and the mixture is cool to the touch (about 5 minutes or so).6.While the egg mixture is beating, place the softened butter in a bowl and mash it with a spatula until you have a soft creamy mass. 7.With the mixer on medium speed, begin adding in two-tablespoon chunks. When all the butter has been incorporated, raise the mixer speed to high and beat until the buttercream is thick and shiny. 8.At this point add in your flavouring and beat for an additional minute or so.9.Refrigerate the buttercream, stirring it often, until it’s set enough (firm enough) to spread when topped with a layer of cake (about 20 minutes).For the white chocolate ganache/mousse (this step is optional – please see Elements of an Opéra Cake below) (Note: The mousse can be made ahead and refrigerated until you’re ready to use it.)What you’ll need:•a small saucepan•a mixer or handheld mixerIngredients:7 ounces white chocolate1 cup plus 3 tbsp. heavy cream (35% cream)1 tbsp. liquer of your choice (Bailey’s, Amaretto, etc.)1.Melt the white chocolate and the 3 tbsp. of heavy cream in a small saucepan.2.Stir to ensure that it’s smooth and that the chocolate is melted. Add the tablespoon of liqueur to the chocolate and stir. Set aside to cool completely.3.In the bowl of a stand mixer, whip the remaining 1 cup of heavy cream until soft peaks form.4.Gently fold the whipped cream into the cooled chocolate to form a mousse. 5.If it’s too thin, refrigerate it for a bit until it’s spreadable.6.If you’re not going to use it right away, refrigerate until you’re ready to use.For the glaze (Note: It’s best to make the glaze right when you’re ready to finish the cake.)What you’ll need:•a small saucepan or double boilerIngredients:14 ounces white chocolate, coarsely chopped ½ cup heavy cream (35% cream)1.Melt the white chocolate with the heavy cream. Whisk the mixture gently until smooth. 2.Let cool for 10 minutes and then pour over the chilled cake. Using a long metal cake spatula, smooth out into an even layer. 3.Place the cake into the refrigerator for 30 minutes to set.Assembling the Opéra Cake(Note: The finished cake should be served slightly chilled. It can be kept in the refrigerator for up to 1 day).Line a baking sheet with parchment or wax paper.Working with one sheet of cake at a time, cut and trim each sheet so that you have two pieces (from each cake so you’ll have four pieces in total): one 10-inch (25-cm) square and one 10 x 5-inch (25 x 12½-cm) rectangle. Step A (if using buttercream only and not making the ganache/mousse):Place one square of cake on the baking sheet and moisten it gently with the flavoured syrup.Spread about one-third of the buttercream over this layer.Top with the two rectangular pieces of cake, placing them side by side to form a square. Moisten these pieces with the flavoured syrup.Spread another third of the buttercream on the cake and then top with the third square of joconde. Use the remaining syrup to wet the joconde. Spread the remaining buttercream on top of the final layer of joconde and then refrigerate until very firm (at least half an hour).Make the glaze and after it has cooled, pour/spread it over the top of the chilled cake. Refrigerate the cake again to set the glaze.Serve the cake slightly chilled. This recipe will yield approximately 20 servings.Step B (if making the ganache/mousse):Place one square of cake on the baking sheet and moisten it gently with the flavoured syrup.Spread about three-quarters of the buttercream over this layer.Top with the two rectangular pieces of cake, placing them side by side to form a square. Moisten these pieces with the flavoured syrup.Spread the remaining buttercream on the cake and then top with the third square of joconde. Use the remaining syrup to wet the joconde and then refrigerate until very firm (at least half an hour).Prepare the ganache/mousse (if you haven’t already) and then spread it on the top of the last layer of the joconde. Refrigerate for at least two to three hours to give the ganache/mousse the opportunity to firm up.Make the glaze and after it has cooled, pour/spread it over the top of the chilled cake. Refrigerate the cake again to set the glaze.Serve the cake slightly chilled. This recipe will yield approximately 20 servings.

Monday, May 19, 2008

BEEF STROGANOFF w/ MUSHROOM SAUCE


Hello, I thought I would actually post something that had to do with real food rather than desserts, what a concept eh? here it goes.


This meal definatley isn't healthy but is very good (if you like mushrooms)


Saute' 2 whole garlic gloves in a 1/2 stick of butter after a minute you can add veal or really any thin steak for about 2 minutes on each side and set aside. Once the steaks are completed remove garlic cloves and add 1 stick of butter and begin sauteing 1 1/2 cups of mushrooms, after those have a nice color add 2 cups of heavy cream and add salt and pepper to taste. Continue to cook for about 5 to 7 minutes and begin boiling a pot of water.


Boil egg noodles according to directions


When sauce begins to thickin add your sliced steak and continue to cook until it has a nice thickness to it (yes this takes awhile...you'll begin to think will it ever thickin...it will be patient) try your best to time this along with your noodles.

Place a bed of noodles on a plate and pour over your creamy mushroom mixture.


and enjoy!!


Sunday, May 4, 2008

PECAN SQUARES

Hello! I have been on a huge dessert kick lately, a stressful day is just relieved with some baking! (and eating what was baked)
This is a good dessert if you really like pecan pie. I received this recipe from a cook book my grandma gave me that was a collection of recipes by Community United Methodist Church. Copyrighted by Morris Press Cookbooks. I have cooked more things from this cookbook and I have enjoyed them all. Hopefully I'll be able to share with you soon!

CRUST - Mix together flour, sugar, butter and salt until mixture resembles coarse crumbs.
Press firmly into 15 x 10 x 1 inch baking pan - Bake at 350* for 20 minutes.

Meanwhile, combine eggs, corn syrp, sugar, butter and vanilla. Stir in pecans. Spread evenly over hot crust. Bake at 350* for 25 to 30 minutes or until set. Cool completely on wire rack and cut into bars.
FULL RECIPE
CRUST-
2 c. Flour
1/3 c. Sugar

3/4 c. butter, softened

1/4 tsp. salt

FILLING-
4 eggs, beaten
1 1/2 c. Corn Syrup
1 1/2 c. Sugar
3 T. butter, melted

1 1/2 tsp. vanilla

2 1/2 c. chopped pecans

In a large mixing bowl, blend together flour, sugar, butter and salt until mixutre resembles coarse crumbs. Press firmly into 15 x 10 x 1-inch baking pan. Bake at 350* for 20 minutes. Meanwhile, combine eggs, corn syrup, sugar and butter and vanilla. Stir in pecans. Spread evenly over hot crust. Bake at 350* for 25 to 30 minutes or until set. Cool completely on wire rack and cut into bars.

Sunday, April 20, 2008

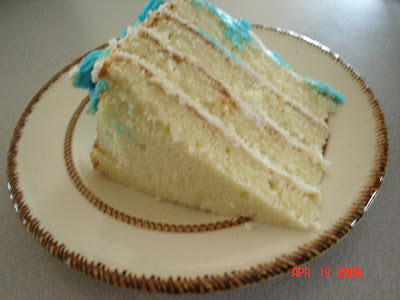
Butter Cake w/Buttercream Icing

Happy Birthday to....nobody? ha ha...I decided I wanted to make this cake after having a very, very stressful day at work Friday. Cooking is my Calgon :) hey that would be a great blog name huh? ha ha, anyway, I just really enjoy baking and making this cake really made me feel better and it tasted really good too! I just got it off the Wilton website, boy do they have a lot out there! I always wanted to take one of their cake decorating classes but with all the instructions I don't see why now. They even provide "practice" sheets to practice icing skills so maybe one day I'll print all that out and really try to become good at decorating. I was just kinda messing around with this cake because of my stress level but I had fun anyway. Anyway, here is how I made it:

Ingredients:
1 1/2 cups butter, room temperature
2 1/2 cups granulated sugar
5 eggs
1 tsp pure vanilla extract
3 cups all-purpose flour
3/4 tsp baking powder
1/4 tsp salt
1 cup milk
Preheat oven to 350*. Spray pans with vegetable pan spray.

In mixer bowl cream butter and sugar until light and fluffy.Add eggs one at a time (mix well after each addition) Mix in vanilla
Mix flour with baking powder and salt. Add flour mixed alternately with milk, starting with flour.
Pour into prepared pans bake for about 40-50 minutes, until the top is golden brown and spongy to the touch


Cool 10 minutes in pan, loosen sides and remove, cool completely before decorating.


I split both cakes with this handy, dandy tool. I just got it so I was quiet impressed...I know I'm amused easily...


Buttercream Icing (I doubled Wiltons recipe)
1 cup solid vegetable shortening
1 cup of butter, softened
2 tsp clear vanilla extract
8 cups sifted confectioners' sugar
4 tbs milk


In large bowl, cream shortening and butter with mixer, add vanilla, gradually add sugar one cup at a time, beating well on medium speed. Scrape sides and bottom of bowl often. Well all mixed in it will appear dry, add milk and beat at medium speed until light and fluffy. Keep bowl covered with a damp cloth until ready to use. For best results, keep icing bowl in refrigerator when not in use, Refrigerate in an airtight container, this icing can be stored 2 weeks. Re whip before using.
Decorate at will...or if your are stressed like I was just have at it and let your anxiety spread away :)
- Maybe I'll take that Wilton class and my cakes will improve :)


Thursday, April 17, 2008

KETTLE CORN

Hi! Yesterday I took another shot at kettle corn from ingredients I pulled from different sights on the Internet. My first attempt was OK but you made the "sauce" separately on the stove and then you mix your popcorn into it...it made it way too soggy...not to mention I put too much salt on it...oops... anyway, this way was much much better - Does it taste "as" good as what you get at a fair? No, but it is very very close... As I play with this recipe more and discover any new tricks I will defiantly share. Or if you know of any please let me know!! Anyway, it is very simple. You can use a pot that you have at home or I used my popcorn popper (even though the directions say not to put sugar in it...it was fine though after I wiped all down when I was done) OK here we go...

Ingredients

*4 Tbs of vegetable oil (or enough to rest your kernels in)

*1/3 cup of popcorn kernels

*I used 1/3 cup of light corn syrup (I might try the regular (non-light) type next time though...)

*1/3 cup of white sugar

*Salt to taste

I put the oil in the popcorn popper and put the kernels on top and covered it and turned it on, once I saw the 1st one pop I began to put the corn syrup and sugar on top as they were popping away. (My popcorn popper is called 'Stir Crazy' and it has these handy holes on the top (well its there to melt butter on top of your popcorn popping - but this worked too!)

See it getting all steamy inside?

Once it is done poppin' add some salt - shake it up and begin your "taste testing". My daughter and I kept tasting and added salt as needed or you could add some sugar if you think it needs more. It was very good and very addicting...We ate the whole thing! (and could of used some more...)

Enjoy!


Tuesday, April 15, 2008

MEATBALL SUBS


For dinner tonight we had meatball subs. I got this recipe from Rachel Ray and I adjusted it a bit for my taste buds...if you want the full recipe go to:


I think I need some more practice with my "food" photos but one day right? Anyway, this is how I made it:
Preheat oven to 450 degrees. Place 1 pound of ground beef and 1 pound of sausage into a bowl and mix well with hands (do not over mix) , then make a well in the middle and fill with 1 beaten egg, 1 cup of Italian bread crumbs, 1 medium onion, 4 cloves of garlic (minced), 4 splashes of Worcestershire sauce, 1 cup of shredded Parmesan and salt and pepper to taste.


Mix together well without over mixing and create meatballs and place on a pan.

Cook for about 15 minutes until cooked through and no pink is showing. After the meatballs have completed I put the buns in for a few minutes to toast them a bit. One day I would like to venture into making "homemade" buns but no time for that on a work night :) until then the bakery will have to do.


Also, when I have more time I would like to make my own marinara sauce but tonight Prego will have to do... My husband prefers the sauce to be heated and put at the table so it can be put on right before eating to avoid sogginess. So I build the sandwiches and placed freshly grated mozzarella and Parmesan cheese on the top and melt it in the oven for a few more minutes.

For tonight I also made fresh french fries with my new deep fryer (stayed tuned...homemade doughnuts this weekend!) I had the temp at 350 and the fries actually came out a bit soggy so I need to bump that up a bit...I'm still trying to dial this thing in but I really like it! You can adjust the temp and set the timer. My husband said I was taring up the stove with all the grease so this was our solution...


ENJOY!!